20% OFF
20% OFF on inks for first shoppers, coupon code: INK20
10% OFF sitewide for first shoppers, coupon code: KS10


Hello Everybody, my name is Caesar TheHun
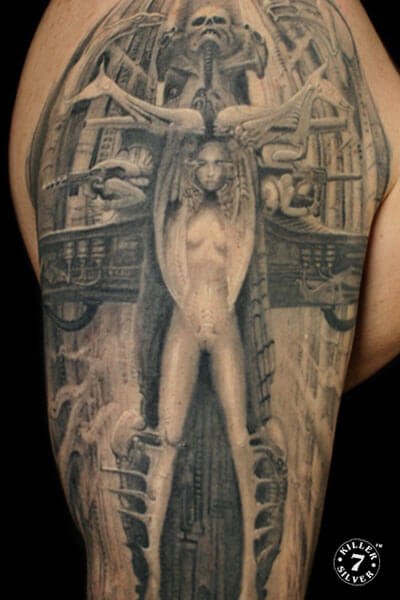
This Killer Silver “The Se7en Deadly Shades” gray-wash line has been manufactured using my meticulously thought out and carrier long developed formula.
I am a self-taught tattoo artist, just like many of you out there. I started scratching in the early 90’s in Hungary. Due to the lack of tattooing tradition in my home country, I consider all of us Pioneers from that era. Tattooing, for me, merely started as a hobby but soon turned into a profession.
After a few years of tattooing, I became very comfortable with the technicalities involved with this profession. I took my time and learned every aspect of my tattoo machine, making sure I learned and understood its physical working processes, so that I could isolate any potential problems and troubleshoot them myself. I also put into practice and perfected my sanitary procedures. Through this, I got to the point where I was able to put ink in the skin nicely with razor sharp lines; there was only one thing missing – and that was my grays for shading (which is required for flawless 3D illusion).
Like most others, I started out with the “post mix” process (mixing different materials such as various inks with each other AFTER you pour them out of the container). Where this is still the dominant practice in black and gray tattooing today and there isn’t necessarily anything wrong with it, it does require much more understanding and experience to learn how to use post mixing to create a breathtaking piece – especially when starting out. The problem I faced at the time was that the “post mix drop system” (certain amount of 100% solid black diluted with certain amount of water to give you some sort of shades) was not consistent enough. A lot of guess work was involved. When I changed brands on black ink, I needed to relearn how they heal and readjust the “drop system” for the required result bacause they all have a different toatal amount of black pigment content.

This was the reason I started experimenting with “premixed” (the ink is already mixed in the bottle in the correct shade) gray-wash ink. I mixed up seven bigger batches of ink at a time, sorted it out into my 2oz bottles and they were good to go for a long period of time. When I would run out of one the shades, I just grabbed the next bottle, poured it out, and that’s it – I was good to go with the exact same quality ink. This was a huge breakthrough in my tattoo work because; it brought consistency and confidence to my every day tattooing. I had no more worry about guessing how dark it will heal.
I tested many different ingredients in various ratios and quality. First, I needed to find out the correct chemical formula (the best and safest ingredients mixed in the correct ratio). Then, I needed to set up the various shades to satisfy my picky gray scale requirements. Many batches were made for establishing and finalizing the range of shades I currently use. After year of year of development I ended up with this grayscale variation: 100%, 60%, 40%, 25%, 12%, 6% and WHITE – A 7 bottle shade system, with 100% being the darkest pitch black ink.
As you can see, this is technically a 6+1 shade system. It allows me to do all sort of grayscale tattoos; from the very subtle/hardly visible “just a touch” of gray shades to pitch black cast shadows.
This formula was THE breakthrough in my tattoo career because it allowed me to tattoo the same way I draw. Thus, I was able to transfer all my artistic knowledge from paper into skin.

I always recommend to learn the above basic “6+1” set up first. I use a circular dial system for setting up my ink caps (black #16). The 100% darkest always at 7o’clock placement, next to it the 60% ink cap at 8 o’clock, then 40% follows at 10o’clock, 25% at 12o’clock, 12% at 2o’clock, and 6% at 4 o’clock. White always stays in the middle.
Regarding the range of shades, I recommend to use the 100% and 60% for Darks, 40% and 25% for Medium Tones, and 12% along with 6% for the very subtle Light Shades of gray.
NOTE : Don’t forget to rinse your needle before you jump between categories!
If you are doing, let’s say, a beautiful brunette chick’s hair… You will use 60% and 100% ink (you cannot see the difference between these guys when they are fresh; they are all BLACK as hell). Then, you want to start with the very subtle shades on that beautiful pale face. But, if you haven’t rinsed your needle and you still have your darks in that tube… What happens? You end up with a dark spot on a pale face!
This is when your mind starts to play a trick on you. If you don’t rinse and you dip into the 6% and jump to the face, you end up inadvertently changing the shade you are working with. What you forgot was that the dark ink loaded in the tube will not be 6% just because you dip it there for a split second. What really is happening is that you ran your needle in the 6% ink cap and technically you are washing your dark ink into that 6% ink cap and changed that cap so that it is not 6% light anymore. It is MUCH darker (we don’t know exactly) because of the injected dark ink. This is why YOU HAVE TO RINSE YOUR NEEDLES BETWEEN SHADE GROUPS!
The fastest way to learn this new system is to take photos of the finished fresh tattoo right after the session, and then another one when it is healed. But, you have to make little notes for yourself during the tattoo session to be able to remember what part was what shade! If it is a portrait, for example: Hair 60%… Lips 40%… Right side of face mostly 12% curved away with 25%… This way you can learn how shades will look like after healing and can create more successful life-like pieces.
I particularly tweaked this set up and doubled my shades through the “Tweeners”. I use #9 clear ink caps between my black #16s. The black ink caps represent the clean “out of the bottle” pre-mixed inks. Tweeners are be-”TWEEN” the black ones and contain equal amount of ink drops from the surrounding black ones. This ends up giving you mathematically correct in between shades.

For Example; 5 drops of 100% Killer Silver and 5 drops of 60% Killer Silver gives you and extra shade around 80%. 5 drops of 25% and 5 drops of 12% give you something around 18%.
The categories will expand for more subtle shades this way:
○ Darks : 100%, 80%, 60%, 50%
○ Medium Grays: 40%, 33%, 25%, 18%
○ Light Shades : 12%, 9%, 6%, 3%

This particular circle/dial shape order is crucial for me, because they all black, so only knowing the location of your shades will insure and consistent shade work. If I turn away and you switch my blacks without telling it to me… it could be a catastrophic failure regarding the outcome.
The 2oz Set allows me to tattoo somewhere around 100-120 hours, because I work pretty clean, don’t waste too much, and I’m not clumsy. I use the same set up for every tattoo I do and end up running out of the bottles at generally the same time, a few drops here or there. Meaning : I can replace my bottles in set instead of individual bottles.